Tag Archives: housing

“Built to Code”

DSC_0092Owning a home that is built to code gives you access to many mortgage options and rebate programs, and can make it easier to sell your home when the time comes. But what does it mean to say a house is “built to code”?

A house is built to code when it meets the requirements set forth in local building code. Local building departments typically adopt the International Residential Code, designed to protect the health and safety of occupants.

The IRC regulates construction of houses, duplexes and townhouse units. It covers the whole building – from structural components such as floors, walls and roofs to mechanical, plumbing and electrical systems. It addresses common and conventional construction practices – and does not cover atypical, custom construction. However, the IRC is constantly being revised to address new technologies and practices as they become more common.

City building departments typically tailor the IRC to their location. For instance, in Fairbanks, city ordinance 5834 amends the code to clarify building type definitions and add requirements for carbon monoxide detectors. It also amends the sections on snow loads, ice barriers and flood loads to apply specifically to Fairbanks.

City building officials determine whether or not a house is built to code with a 3-step process. First, the code official inspects the building plans and identifies any code deficiencies. These issues will have to be revised before a building permit is issued. If the code does not address a technology or construction practice used in the building, the code official will decide as to whether or not adjustments should be made.

Second, the house must be inspected during construction – including foundation, walls, electrical system, mechanical system, ventilation system and more. Contractors must arrange inspections during certain construction milestones.  If the code official determines the house does not meet code requirements, contractors must bring it up to code before moving on.

At the end of construction, there is a final inspection and the city issues a certificate of occupancy.  At this point, the house is considered “built to code.”

While building code technically only applies to homes inside city limits, homes in the greater borough can also be inspected to receive a certificate stating they meet code if the homeowners need a mortgage or loan.  In this case, rather than going through the city building department, builders will have to consult with the International Council of Building Officials, a group of building inspectors.
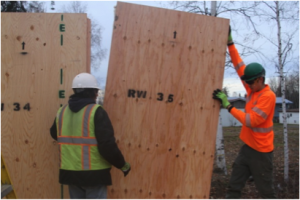
What are Structural Insulated Panels and considerations for Alaska

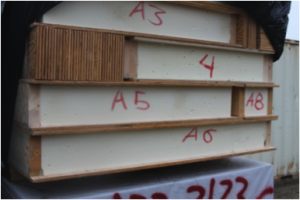
SIPsStructural Insulated Panels, or SIPs, are prefabricated building panels that combine structural elements, insulation, and sheathing in one product. SIPs can be used for the walls, roof and floor of a building in place of more traditional construction methods, such as stick-framing. A SIP typically consists of a foam insulation core with a structural sheathing panel bonded to both faces. Sheathing panels are usually made of industry standard OSB or plywood.

Building with SIPs


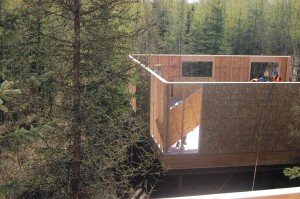
Constructing a home from SIPs begins at the design phase: builders must work with the SIP manufacturer since the panels are specific to the design. Once the plans are finalized, the SIPs are made and shipped to the job site. The panels are labeled so builders know exactly where each panel goes in the building.

As they are erected, the panels must be joined together according to manufacturer specifications. For instance, many panels are joined with splines that are secured with screws. When the structural connections between panels are being made, workers must take care to seal the joint between the panels to ensure it remains airtight. Air sealing the panel joints can be accomplished using sealing agents such as caulk, adhesive, mastic, spray foam or tape. A tight seal is also necessary in order to prevent moisture from entering the panel, which can lead to structural deterioration of the panel components over time. Some building inspectors may require a 6mil polyethylene sheeting vapor retarder be installed on the interior side (warm side) of the SIPs once the panel construction is completed.

SIPs2

Electrical outlets and wiring are usually installed into recesses and holes pre-cut into the panels, both on the interior and the exterior as needed. Any special considerations for running electrical systems or other mechanical penetrations through the SIPs should be addressed with the manufacturer during the design phase.

Benefits and Concerns

There are several potential benefits to building with SIPs. For one, the absence of an air permeable wall cavity prevents convective heat losses from occurring within the panels. Large panels will have fewer framing members than a stick-framed wall, which reduces heat losses due to thermal bridging. With a trained crew, SIP buildings can be erected quickly, a big advantage in climates with short building seasons. Properly constructed, a SIP panel home can realize a high level of air tightness and energy efficiency.

On the other hand, builders must take extra care to ensure proper assembly and sealing to prevent any problems due to moisture infiltration and air leakage. Builders also do not have much flexibility in on-site design changes, since panels come pre-cut. An experienced builder who can work through a home design with the manufacturer and who doesn’t cut corners with sealing panel joints is a necessity.

SIPs can be either cost-effective or cost-prohibitive depending on the situation. The design services and shipping costs may drive the price of SIPs above that of conventional framing materials. However, this can pay off in reduced labor costs if a trained crew erects a building quickly, or if several buildings of the same design are being erected.

Egress and Home Safety

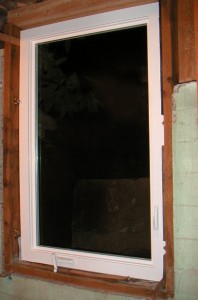
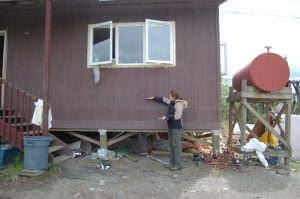
MINOLTA DIGITAL CAMERAEgress is a means of emergency escape. Not surprisingly, all houses need egress for events such as a fire, and emergency egress is required by the International Residential Code for residential buildings. The IRC requires a form of egress in basements and rooms where people sleep. Each bedroom must have its own emergency exit.

While egress could be a door opening to the outside, it is most commonly a window, and the IRC specifies minimum requirements for egress windows. For one, an egress window needs to open to a public street, alley, yard or court. Also, the window must meet minimum size requirements so people can exit. The minimum size is 5.7 square feet, unless the windowsill is on the floor, in which case the minimum is 5 square feet. The window must be at least 2 feet tall and 20 inches wide. Meeting the minimum height and width requirements doesn’t guarantee meeting the minimum area, so the window will have to be larger in at least one of those dimensions.

Finally, the window cannot be more than 44 inches from the floor, and people must be able to open the window without any special tools or knowledge. Window coverings, such as a screen or bars, are OK, but people need to be able to remove them without any special force, tools or knowledge.

Basements are often located below grade, or below the typical ground level. Since egress windows in basements wouldn’t do much good opening to soil, a window well is required outside the window. The window well should be large enough for the window to open fully, and also should contain a ladder if the well is more than 44 inches deep. Of course, the IRC specifies well and ladder dimensions if this situation applies to your home.

Does your house have emergency egress? Some older homes built before the IRC requirements do not. A means of egress is sometimes overlooked during remodels — for example, converting a space to a bedroom that was not initially planned for that use. If you have a room that does not meet the minimum egress requirements, there are many reasons to correct the problem, the most important being providing a way to exit a house safely in an emergency.

Adding egress windows in required rooms will allow your house to pass inspection should you decide to sell it and will add value to the home as well. Sometimes, adding or replacing windows can become a major project, and it must be done correctly to avoid air leakage and drainage problems later. If you need to install egress windows, find a contractor familiar with the building code and who will take the time to properly install energy efficient windows that meet the requirements.

Vapor Barriers and House Wraps: where and why?

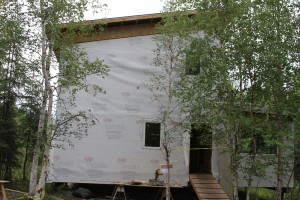
House wraps must stop bulk water from entering on the cold side and also be permeable enough to allow water vapor to pass through from the warm side.

House wraps must stop bulk water from entering on the cold side and also be permeable enough to allow water vapor to pass through from the warm side.

The building envelope is defined as those parts of a house that keep the indoor and outdoor environments separate. The building envelope includes the exterior walls, roof, windows, doors and the foundation and/or ground floor.

As elements of the building envelope, vapor barriers and house wraps are a critical part of controlling moisture and air flow through your home.

If selected and installed properly, these products can help you conserve energy, prevent mold growth and maintain the structural integrity of your home. On the flip side, not using these products or using one incorrectly can have the opposite effect.

Vapor barriers on the warm side

A vapor barrier, also known as a vapor retarder, is a layer of material designed to slow or nearly block the movement of water vapor by diffusion. How much a vapor retarder impedes the movement of water vapor is referred to as its permeability rating, or “perm” rating.  Six-mil-thick (0.006 inch) plastic sheeting is a typical vapor retarder material prescribed by residential building codes in cold climates, as its perm rating is extremely low.

In standard cold climate frame construction, the plastic vapor retarder is located on the warm-in-winter side of the wall — typically it is applied over the studs directly behind the drywall.

All homes contain moisture inside — cooking, bathing, breathing all create water vapor. In winter time the challenge then becomes keeping this water vapor from reaching places in the building envelope where it can condense.

Ventilation, which is essential to exchange moisture-laden air with clean, dry air, helps reduce the quantity of moisture in a tight home, but not enough to eliminate the need for a vapor retarder.

Where it gets interesting is that 98 percent of water vapor in a home travels by air leakage, while only the remainder moves by diffusion — through solid materials such as the drywall and sheathing in your walls. So, with proper sealing around penetrations and by sealing overlapping layers, we can also rely on the plastic vapor retarder to serve as an air barrier.

House wraps on the cold side

House wraps, on the other hand, are primarily designed to cope with the elements on the outside. They must be permeable enough to allow water vapor to pass through them from the warm side, but still stop bulk water like rain from entering on the cold side — similar to a Gore-Tex jacket.

By nature, house wraps must be vapor permeable enough to allow for drying if moisture finds its way into the wall cavity from either the inside or the outside. In addition, house wraps can help minimize the movement of air in and out of the exterior walls. Air movement through the building envelope in an uncontrolled manner, means you’re losing heat, which can become a burden on your budget.

To effectively repel water and reduce airflow, house wraps must be detailed correctly and applied using the manufacturer’s recommended methods and adhesives. All the penetrations into your walls from the exterior, such as vents, electrical connections, and architectural features, must be carefully accounted for.

The right types of house wraps can perform an important job in windy places by stemming significant heat loss and keeping the framing protected from precipitation that gets past the siding.

Final thoughts

The placement and permeability of vapor barriers and house wraps are addressed by building codes, but vary by region. Vapor barriers are required on the warm-in-winter side of the exterior walls in Fairbanks.

This article only touches on the details required to choose and install vapor barriers and house wraps. Placement and water vapor permeability can be a fairly complicated issue because of the wide variety of products on the market today.

You can find resources at CCHRC, the University of Alaska Fairbanks Cooperative Extension Service, and your local building department to help you make the right decisions. Doing your research up front will help maximize home performance and prevent problems later.

What should I be aware of when building on permafrost?

If pilings are used on permafrost, they must be installed to a depth that will both support the structure and resist frost jacking due to seasonal ground movement.

Permafrost is loosely defined as soil and/or rock that remains frozen for more than two years. In the Fairbanks area, permafrost tends to be discontinuous and is concentrated primarily on north-sloping hills and in lower elevations with heavy ground cover. Big trees do not guarantee the absence of permafrost; it might just mean that permanently frozen ground or ice is down far enough that the soils in that spot can support a larger root system. The only way to be certain of what the ground contains is to have a soils test drilling done.

With permafrost, the safest bet is to it avoid it altogether and move to another piece of land. This is easier said than done, particularly because of the scarcity of buildable land near Fairbanks that is affordable. If you decide to build on permafrost, be as strategic as possible. Smaller and simpler structures will tend to fare better than larger, more complicated ones.

Minimal site disturbance is the accepted practice. The trees and the ground cover are your best friend. They protect and insulate the ground from the heat of the summer. A great example is the green moss you find on many of the shaded low-level areas in Fairbanks. Moss has a high insulating value, and in many cases if you dig down a couple of feet, the ground might still be frozen in the middle of summer.

Strategies for construction on permafrost include:

• As a general rule, the organic layer of ground cover provides insulation and should not be removed, as this will increase the risk of thawing any frozen ground underneath.

• Elevate and properly insulate the bottom of your house to prevent heat losses through the floor system from reaching the ground underneath, which can lead to thawing.

• In post and pad construction, use a thick gravel pad that is significantly wider than the house itself (also insulated if possible) to stabilize the ground and spread building loads.

• If wood or steel piles or helical piers are used, they must be installed to a depth that will both support the structure and resist frost jacking from seasonal ground movement.

• Cut trees sparingly to maximize site shading (while permitting for a fire break).

• Build a wrap-around porch, which will help shade the ground around and underneath the house.

• Incorporate large roof overhangs to shed water away from the house and provide shade.

• Install gutters and manage site drainage well away from the house.

• Retain an engineer familiar with local soils conditions to assist in designing a foundation system that will adequately and safely support your home on the soils specific to your site.

• Septic systems also must be engineered to function on permafrost, and remember that conventional systems might risk thawing the ground.


Other Resources 


Permafrost Technology Foundation case studies: http://www.cchrc.org/permafrost-technology-foundation-library

U.S. Permafrost Association website: www.uspermafrost.org/education/PEEP/ptf-manuals.shtml

UAF Cooperative Extension Service online publications at www.uaf.edu/ces.


What is causing all the black spots in my attic insulation?

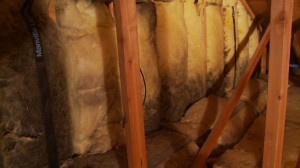
attic insulation stained with dirt

Although mold can’t be ruled out, it is quite probable that it may be caused by something else.

Just because you have dark spots on your insulation doesn’t mean you have a festering mold problem. Air leakage from inside the house through the walls and ceilings can produce some pretty dramatic localized black spots in fiberglass batts.  Typically, fiberglass batting isn’t good at stopping air leakage, but it does act as a very effective filter material for airborne dust particles. Dirty insulation is a phenomenon that is especially common in older, leaky houses in the Interior.

In a recent attic inspection of a 30-year-old home, CCHRC found batt insulation riddled with dark streaks. The source of the streaking was a lot of air leakage through electrical outlets, wiring penetrations, gaps in the vapor retarder, gaps around furnace ducting, chimney, and other sources.

Particulates released by combustion appliances, such as wood stoves, boilers, furnaces, diesel heaters or auto exhaust, can produce very fine soot that can build up over time in insulation. Tobacco smoke can also contribute.

Look for clues in the pattern of the dark stuff. Does it match up with an air leakage pathway? For example, air from inside the home can exit through an unsealed electrical penetration in the ceiling and follow the wiring through the insulation, depositing dirt in the surrounding fiberglass along the way.

Does the wood framing or sheathing around the insulation also have black spots? If not, it is more indicative of dirt than mold.

If you are still concerned that you may have a mold problem, call a mold expert to make a positive identification.


Do you need a vapor barrier on a raised floor?

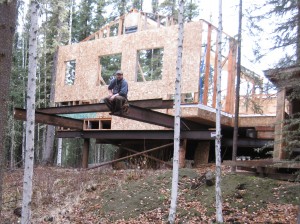
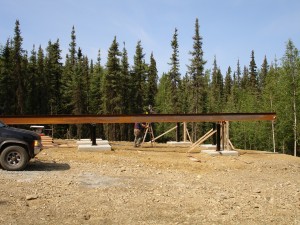
I-beams for a new home built on post-and-pad

Post and pad foundations are a common sight in Fairbanks, as they represent one of the least expensive approaches to building on unstable soils – of which we have no shortage. Usually the floor is raised several feet off of the ground, and air flows freely underneath.

It is standard practice in cold climate construction to install a vapor retarder on the “warm side” (indoors) of the exterior walls and ceilings. This keeps the water vapor generated in the living spaces during the cold seasons from entering the insulated cavities, where it can condense and lead to mold and rot. Installers typically use polyethylene plastic sheeting in a “6 mil” thickness, which is mandated by local building codes.

With post and pad construction, it may seem logical to also install plastic sheeting over the tops of the floor joists before laying down the subfloor sheathing.  In some cases however, it can do more harm than good.

If any rainwater leaks through the joints in the subfloor before the roof is on, it will be stopped by the plastic, and the floor may not be able to dry out quickly enough to avoid mold and decay. The same risks hold true if liquids are spilled on the floor once the house is finished, or if a major plumbing leak occurs. The plastic also prevents the use of subfloor adhesive between the joists and sheathing, which is designed to prevent squeaks in the floor. Modern subfloors are usually sheathed with industry-standard ¾-inch tongue and groove exterior-rated plywood, or oriented strand board (OSB).

With post and pad construction, the subfloor sheathings are less at risk for moisture issues to begin with. That’s partly because warm indoor air leaves at the top and is replaced by outside air drawn in at the bottom, so water vapor moves upwards – away from the floor. In addition, the combination of thickness and types of glues used in ¾-inch plywood and OSB subfloor sheathings means they are less likely to absorb any moisture that might be forced into the house.

To minimize air leakage through the floor, the unsupported seams can be caulked with an adhesive sealant, such as a silicone, that bonds well with wood. The decision of whether to use or omit a plastic vapor retarder in floors using post and pad construction ultimately rests with the engineer or the local code official, who may have reasons specific to the project or building site.

Emergency Housing at Crooked Creek

CCHRC staff examine flooding damage at Crooked Creek homes

CCHRC is working on a housing project in the village of Crooked Creek that symbolizes a new way of responding to disasters in rural Alaska. The Kuskokwim River flooded the village in May, damaging or destroying half the homes in the town. The Alaska Division of Homeland Security and Emergency Management asked us to quickly design nine new energy efficient homes that could be built before winter.


We’ve created a design that is simple—it can be built by the many volunteers involved—flexible—it can be applied to homes with different sizes and floor plans—and tight—it can be heated with far less fuel than existing homes. The entire structure-walls, floors, and roof-will consist of a single system of 2x4s, so the homes will be quick and easy to build. This project is a milestone for rural housing because it adds an energy efficiency focus to the emergency-response building process. It recognizes that even replacement housing needs to be efficient, climate-specific, and durable.

We’re adapting techniques from prototype houses that we’ve tested in other villages, like Anaktuvuk Pass and Quinhagak, such as spraying foam insulation against metal siding to create a complete thermal envelope. The building sites will be elevated above the floodplain on gravel pads.

This is part of a larger plan with the Alaska DHS&EM to create regionalized, grab-and-go models that can respond to different disasters all over the state.

Our project partners include the Alaska DHS&EM, the Village of Crooked Creek, the regional corporation Calista, AVCP Regional Housing Authority, and Samaritan’s Purse.

How to heat your home using the cold ground

Our new report shows that ground source heat pumps are an effective and affordable technology for parts of Alaska, including Fairbanks, Juneau and Seward.
In this video, CCHRC researcher Colin Craven discusses how heat pumps work and what you have to think about before installing one in Alaska.