The UAF Sustainable Village broke ground on Friday, April 6 on lower campus near the Cold Climate Housing Research Center.
The development will feature innovations in cold climate construction—with super-insulated building envelopes to minimize heat demand—as well as experimental approaches to energy, ventilation and wastewater treatment. The homes will serve not just as student residences but also as housing prototypes, building science labs, and teaching tools.
UAF students helped CCHRC develop the concept for the homes, through a design contest, and will help build and conduct research on the Village as well.
“The thing that’s unique about this project is it’s engaging students for the first time in the development of sustainable housing,” said Michele Hébert, who heads the UAF Office of Sustainability. “Our hope is that this will lead to more young people learning how to live sustainably and be future leaders in sustainability.”
The 1,500-square-foot homes will have an R-50-60 envelope and will use a mix of solar, biomass and conventional fuel. A 14 kw photovoltaic array was funded by the university sustainability grant.
The project will demonstrate that a highly energy efficient 4-bedroom home can be built in Fairbanks without breaking the bank. The budget is approximately $200,000 per home. The rent will approximate the cost of a mortgage for an equivalent new single-family home in Fairbanks and be competitive with dorm rates.
Construction will be done by seasoned carpenters along with UAF student workers. Student residents move in in mid-August, so we will be busy for the next few months!
-

- A pile driver hammers hammers a steel round into the ground, part of the piling foundation.
-

- UAF Chancellor Brian Rogers describes what the Village means to the university community.
-
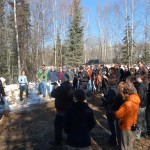
- UAF Sustainable Village breaks ground on April 6, 2012 next to the Cold Climate Housing Research Center
-

- CCHRC President Jack Hebert along with UAF Chancellor Brian Rogers share their goals for the Village.
-

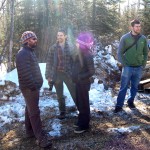
- Lyle Axelarris participated in the student design competition and helped CCHRC design certain aspects of the Village.
-
- Students proposed ideas and concepts for the Village through a student design competition.


