Tag Archives: alaska

“Built to Code”

DSC_0092Owning a home that is built to code gives you access to many mortgage options and rebate programs, and can make it easier to sell your home when the time comes. But what does it mean to say a house is “built to code”?

A house is built to code when it meets the requirements set forth in local building code. Local building departments typically adopt the International Residential Code, designed to protect the health and safety of occupants.

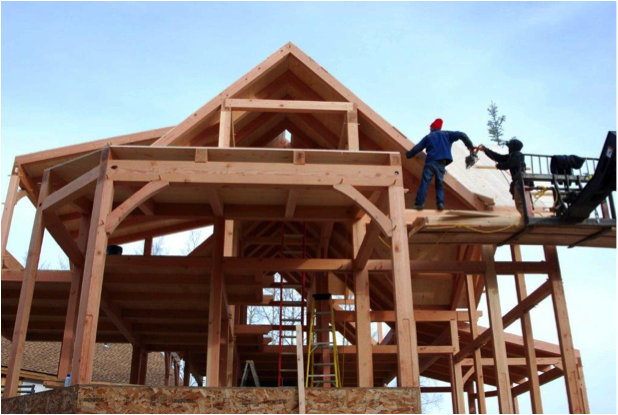
The IRC regulates construction of houses, duplexes and townhouse units. It covers the whole building – from structural components such as floors, walls and roofs to mechanical, plumbing and electrical systems. It addresses common and conventional construction practices – and does not cover atypical, custom construction. However, the IRC is constantly being revised to address new technologies and practices as they become more common.

City building departments typically tailor the IRC to their location. For instance, in Fairbanks, city ordinance 5834 amends the code to clarify building type definitions and add requirements for carbon monoxide detectors. It also amends the sections on snow loads, ice barriers and flood loads to apply specifically to Fairbanks.

City building officials determine whether or not a house is built to code with a 3-step process. First, the code official inspects the building plans and identifies any code deficiencies. These issues will have to be revised before a building permit is issued. If the code does not address a technology or construction practice used in the building, the code official will decide as to whether or not adjustments should be made.

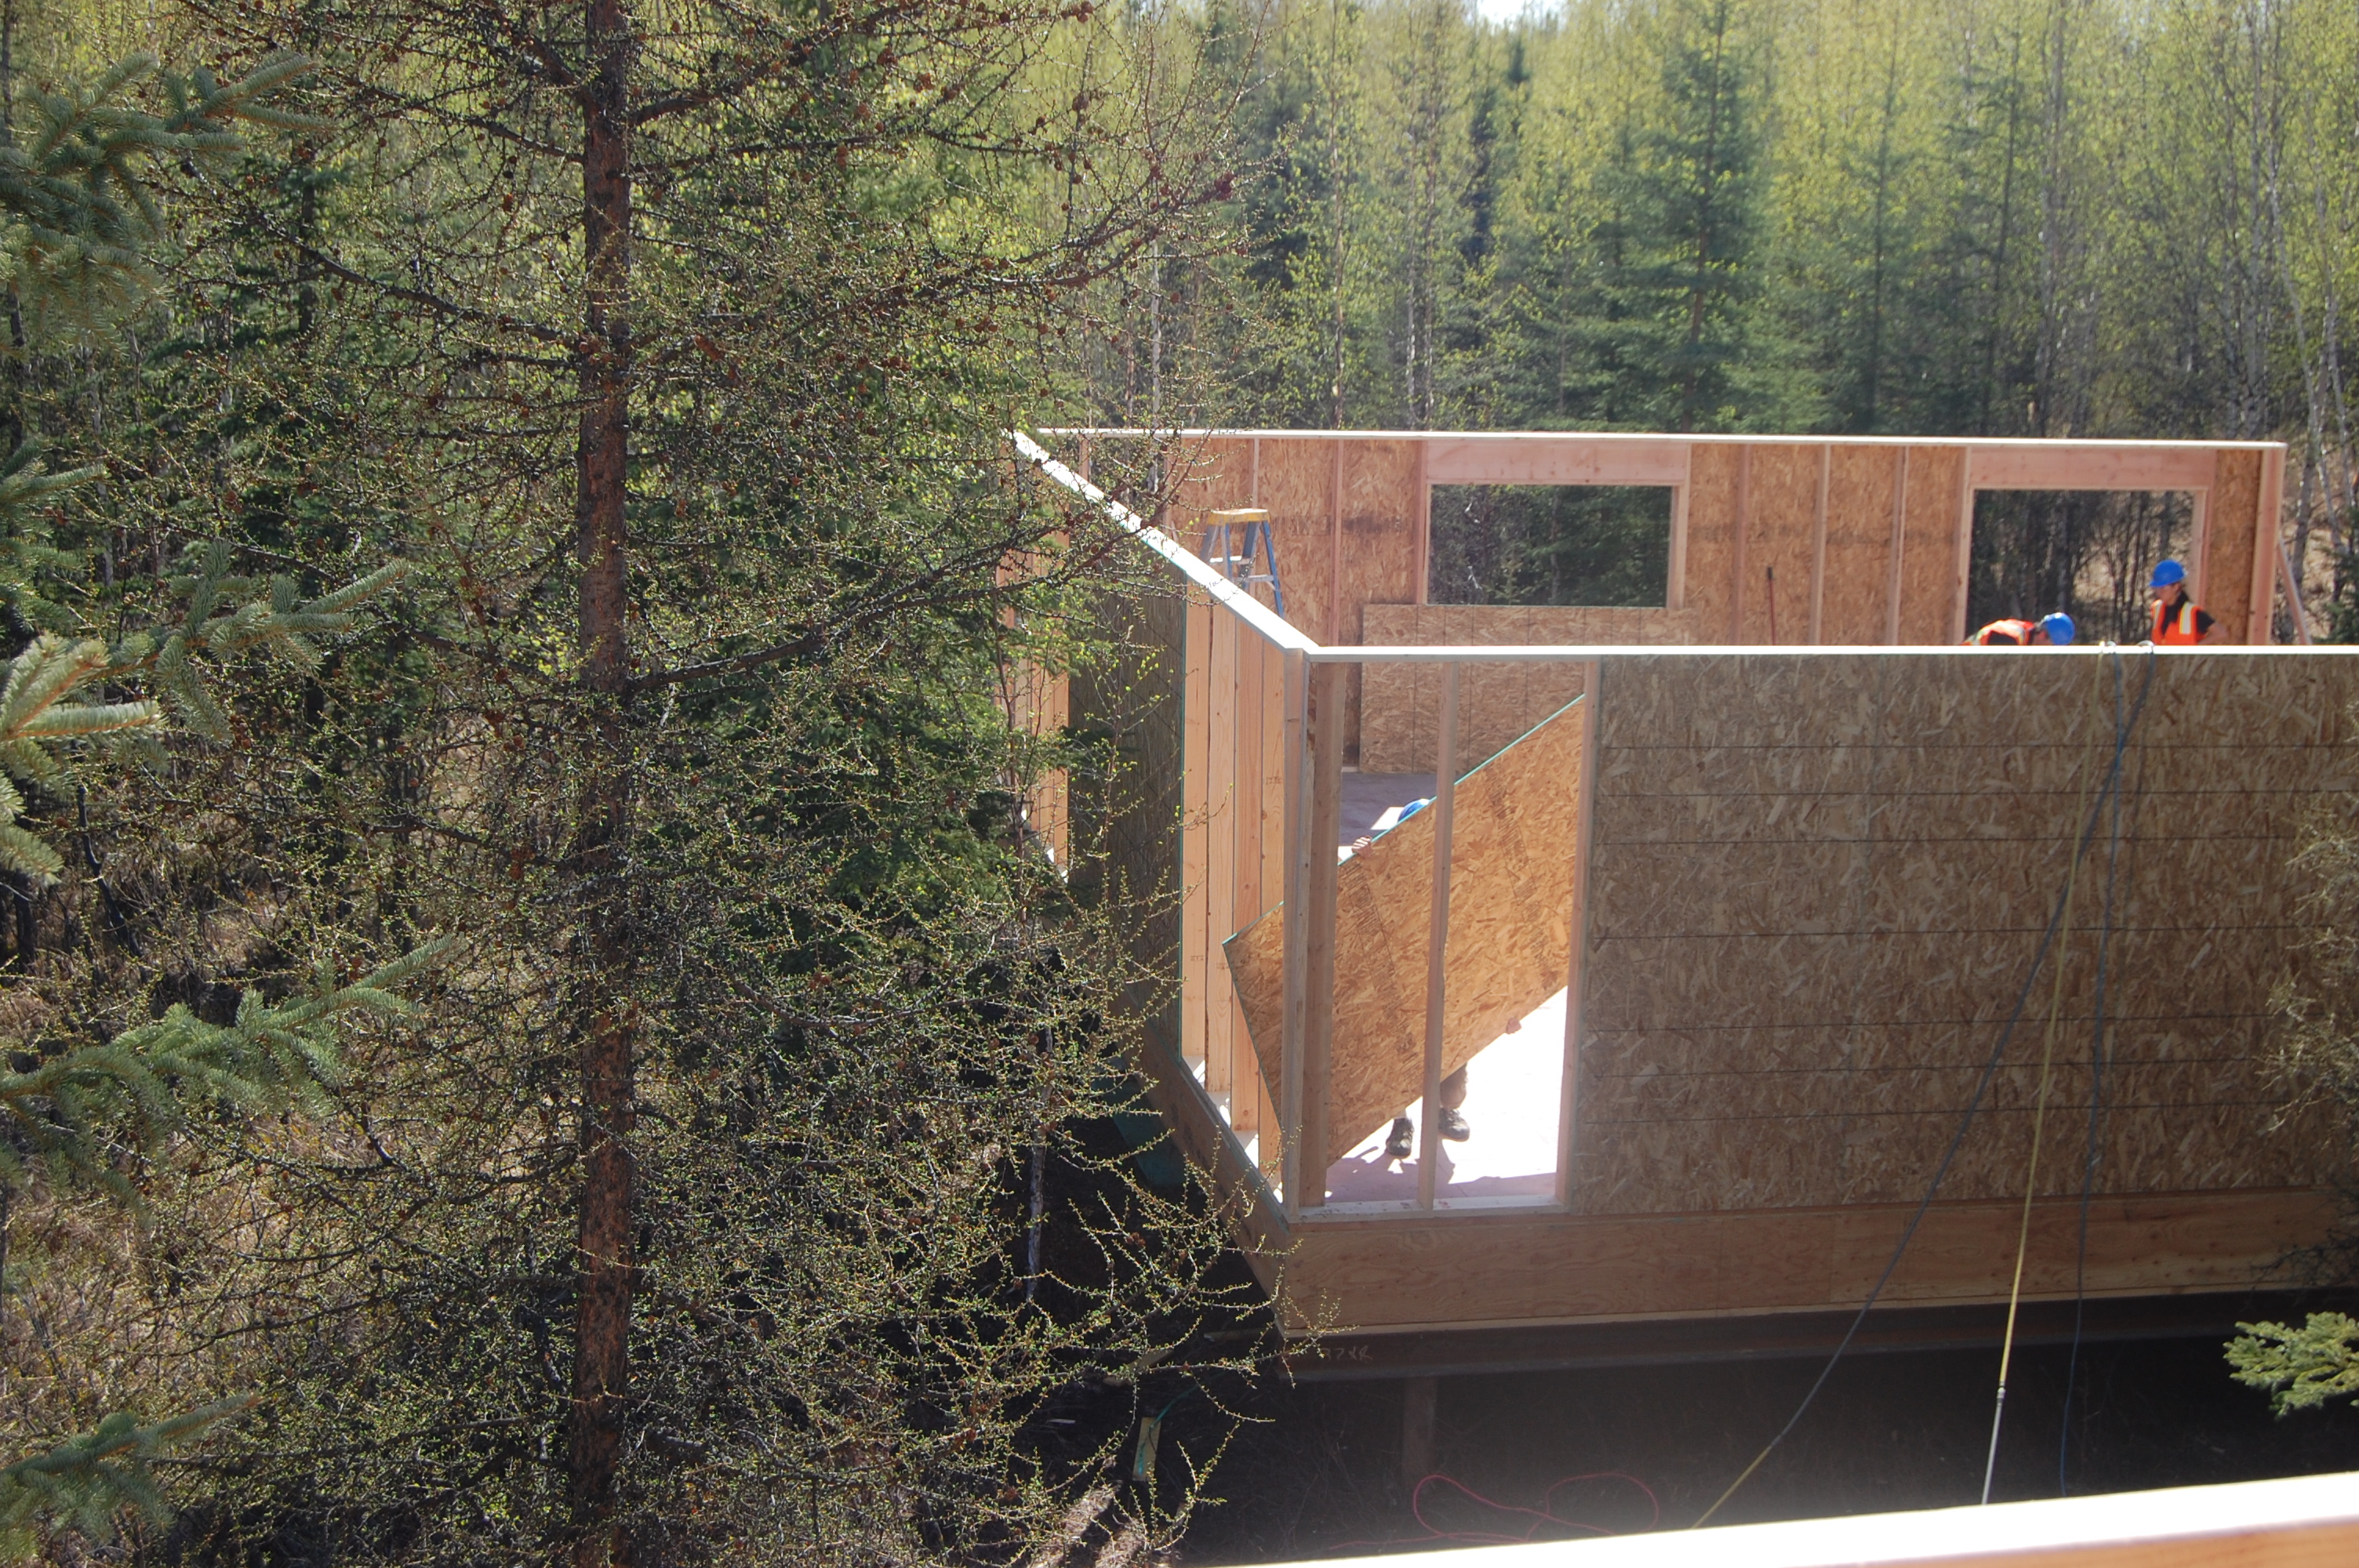
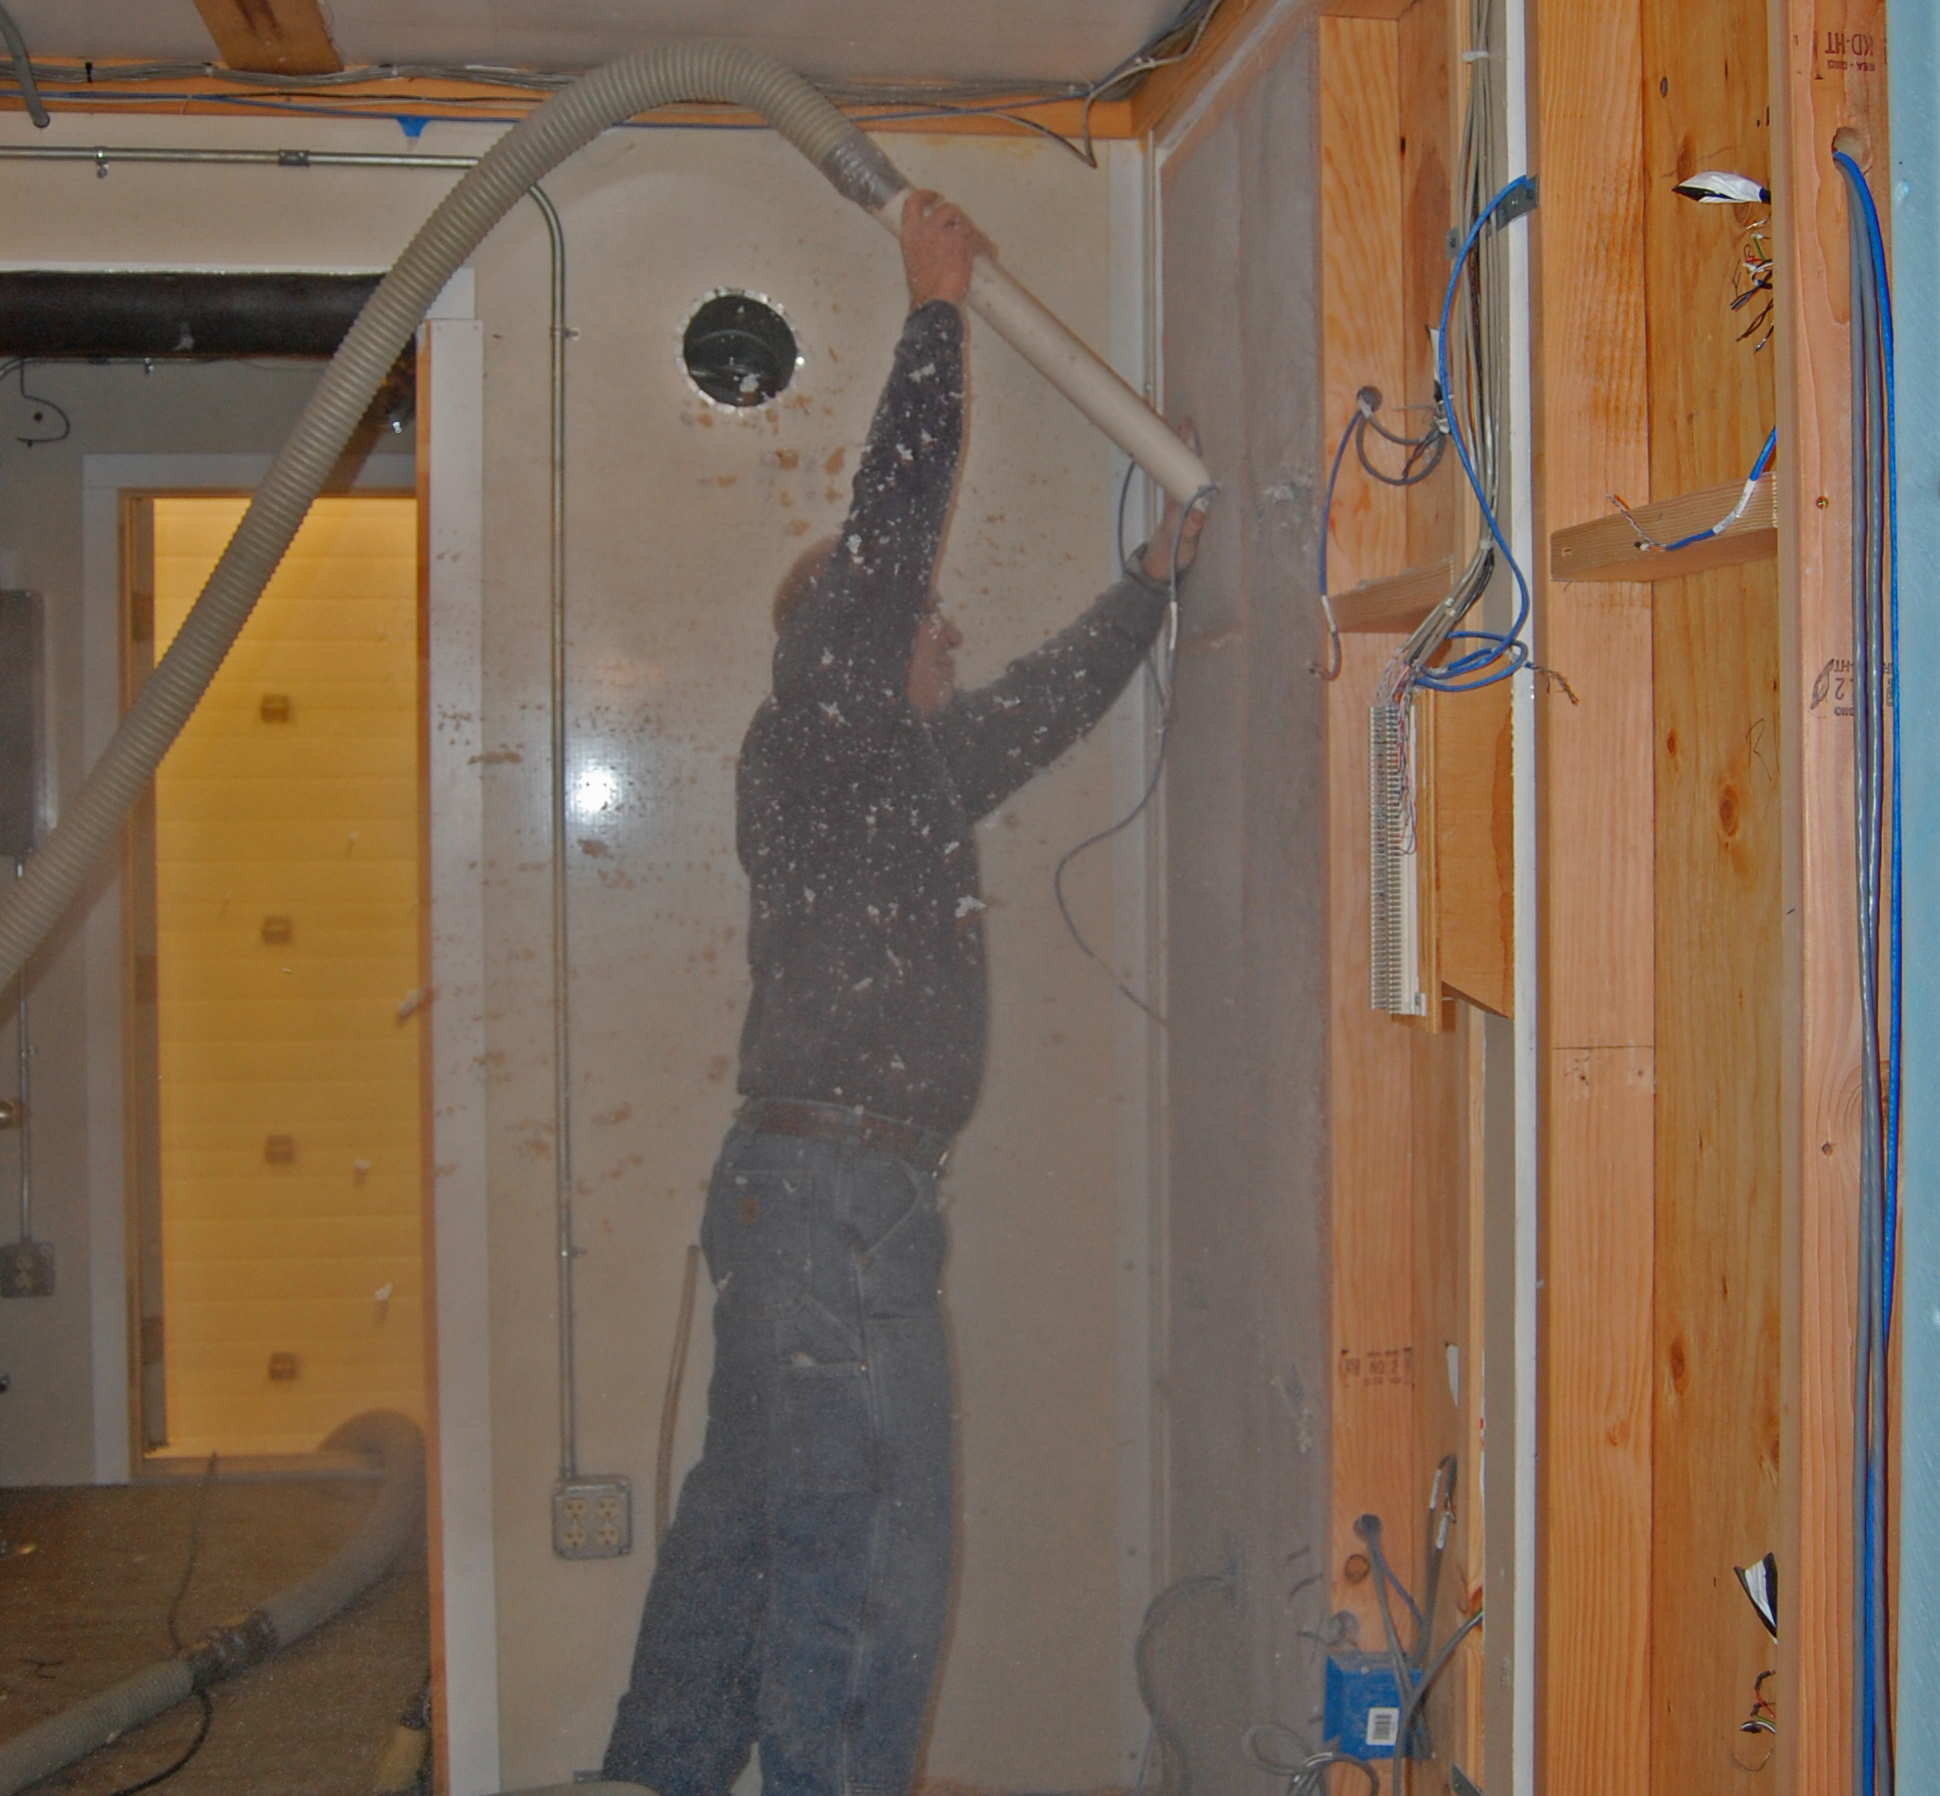
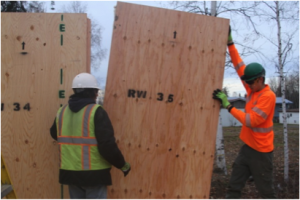
Second, the house must be inspected during construction – including foundation, walls, electrical system, mechanical system, ventilation system and more. Contractors must arrange inspections during certain construction milestones.  If the code official determines the house does not meet code requirements, contractors must bring it up to code before moving on.

At the end of construction, there is a final inspection and the city issues a certificate of occupancy.  At this point, the house is considered “built to code.”

While building code technically only applies to homes inside city limits, homes in the greater borough can also be inspected to receive a certificate stating they meet code if the homeowners need a mortgage or loan.  In this case, rather than going through the city building department, builders will have to consult with the International Council of Building Officials, a group of building inspectors.

A Holistic Approach to Sustainable Northern Communities

The First Roundtable on Holistic Design at CCHRC in Fairbanks, October 2014.

The First Roundtable on Holistic Design at CCHRC in Fairbanks, October 2014.

Tens of millions of dollars are spent each year on housing and infrastructure to improve quality of life in rural Alaska – wind turbines, power houses, roads, housing, weatherization, plumbing, and much more. Meanwhile, many Alaska communities are struggling to survive in the face of energy costs, climate change, coastal erosion, lack of jobs, and other challenges.

Plenty of organizations are trying to help – state and federal agencies, regional corporations, housing authorities, tribal entities, nonprofits – each focused on an individual aspect: energy, housing, sanitation, transportation, health, local economies, culture, education. Yet rarely do we address all these pieces in a holistic approach. The evidence is everywhere: brand new $70,000 sewer lines hooked up to rotting houses; leaky homes in villages that pay $8 a gallon for heating fuel; roads built one year and dug up the next to install water pipe.

Jack Hebert with CCHRC talks about the role of energy efficient housing and indoor air quality in community development.

Jack Hebert with CCHRC talks about the role of energy efficient housing and indoor air quality in community development.

The Holistic Approach to Sustainable Northern Communities is a demonstration project that will factor in the many elements of community development. It started with two roundtable discussions this fall, where leaders from all levels of government and community planning came together and shared their successes and challenges, their needs and ideas for a more effective process. Now we are planning a pilot project in the Yukon Kuskokwim region that starts with one piece and builds a model of collaboration for all communities in Alaska.

Stay tuned for our next roundtable in Anchorage in December!

What are Vacuum Insulated Panels?

Vacuum insulated panels, or VIPs, are a relatively new product making their way into buildings in the United States.

They can be used as stud cavity insulation or as continuous exterior insulation on structures, just like other types of insulation.

As the name describes, VIPs consist of a panel with the air inside of it removed to form a vacuum. It isn’t a perfect vacuum, but the air pressure inside the VIP is considerably less than ambient pressure. The panels are airtight and resistant to water vapor absorption. They make good insulators because the lack of air almost completely eliminates conductive and convective heat transfer through the center of the panels. Typical panels are fairly small, 1 x 2 feet or 2 x 4 feet, and about 1 inch thick.

VIPs have an R-value of approximately R-25 per inch at the center of the panel and about R-20 for the whole panel (exact R-value depends on the manufacturing process and materials). The center of the panel will have a higher R-value than the edges, much like a window, as edges provide a thermal bridge for conductive heat transfer and lower the R-value of the entire panel. Even the whole-panel R-value is considerably higher than other insulations: fiberglass batts are around R-3.8 per inch, EPS is around R-4 per inch, and XPS is around R-5 per inch.

VIPs are installed on the sheathing plane of a building using adhesive. The material surrounding the VIPs in a wall is very important, because it helps protect the VIP from damage during installation. However, because the VIP is not continuous, the lower R-value surrounding insulation will bring the total wall R-value down. This is similar to what happens in a traditional stud-framed wall with fiberglass batts in the cavities — the wooden studs provide a thermal bridge for heat to escape and reduce the total wall R-value. With VIPs, even if the “studs” were made of EPS insulation, the whole wall R-value will still drop more than the fiberglass wall drops with the addition of wooden studs. It is important to consider how to provide structure for VIPs without providing too much thermal bridging.

As with any new building product, there are potential disadvantages of using VIPs that must be considered. First, VIPs must be manufactured in a factory and then shipped to the building site.

They can’t be cut or modified in the field. This means that detailed plans must be completed prior to construction and there is no flexibility in modifying them, unlike a traditional stick-framed wall.

VIPs also cost quite a bit more than other types of insulation. In addition to the more intensive manufacturing process, the panels have to be shipped to the building location.

There are currently only a few manufacturers in the United States, so this could be quite a long distance.

Finally, panels will naturally lose some vacuum over time. When they do, the R-value drops substantially. Manufacturers currently estimate the lifespan of the vacuum at 25 to 50 years. The seals must be treated carefully during the shipping and installation process to protect the vacuum. And putting a nail through a VIP damages the R-value of the panel much more than with other types of insulation. Losing the panel vacuum due to a hole in the panel reduces the panel’s R-value by more than half, often bringing it down to around R-6 per inch.

VIPs in Alaska

VIPs have a number of applications throughout the world, including refrigeration equipment, vending machines, shipping containers and construction. A few companies are manufacturing them in the United States, including Nanopore and Dow Corning. The new engineering building at the University of Alaska Fairbanks will use Dow Corning VIPs in a test wall system, which consist of fumed silica (basically glass powder) wrapped in a layer of plastic and aluminum. In effect, the plan is to replace some EPS foam in the wall system with a small vacuum panel. UAF researchers are planning to measure the installed R-value of the panel to study its appropriateness for buildings in our climate.

Moisture Performance of Cellulose Insulation

Blowing dense-pack cellulose insulation into the test walls.

Blowing dense-pack cellulose insulation into the test walls.

Building envelopes have a hard job in Interior Alaska—keeping us warm, dry and healthy at 40-below. CCHRC tests a variety of building designs and products to see how they can be applied in this environment. We recently studied the moisture performance of cellulose insulation to see how it compared to other common types, like fiberglass and rigid foam, and how it performed in a super-insulated house.

First, let’s look at a conventional wood-framed wall with 2×6 or 2×4 studs and an interior vapor barrier. This system has historically worked in the Interior because the vapor barrier limits the moisture allowed into the walls and moisture that does sneak in remains frozen through most of the winter. During the spring, the walls thaw and dry to the outside.

But when you add exterior foam insulation to a house, a common retrofit technique to save energy, the walls can no longer dry to the outside. Is this good or bad for the wall? Depends on how much you add. If you add enough exterior insulation (for example, six inches of EPS foam for a 2×4 wall) the sheathing and framing will stay warm enough to avoid condensation, improving your overall moisture control. If you don’t add enough, however, you move your wall sheathing into the danger zone—above freezing and very humid.

We’ve learned from earlier studies how to use fiberglass and EPS and XPS foam in various wall systems to improve energy efficiency while avoiding moisture problems (See cchrc.org/safe-effective-exterior-insulation-retrofits). This latest study looked at how cellulose performed in different wall scenarios over an 18-month period. These were not standard walls—they intentionally lacked a vapor barrier because we wanted to force moisture into the walls.

Cellulose insulation is made primarily of recycled paper. As a local, rather inexpensive product, it has recently become more popular in building in Interior Alaska. “Dense-pack” cellulose is blown into a wall to a density of 3.2 pounds force per cubic foot, which is designed to prevent the insulation from settling over time. Dense-pack cellulose has an R-value (or insulation value) of 3.7 per inch—slightly higher than fiberglass batts and slightly lower than EPS foam.

Our study shows that cellulose can handle moisture better than fiberglass or EPS insulation when used properly. The test wall that used cellulose as both interior and exterior insulation maintained lower humidity levels (and was less likely to condense or grow mold) than the test wall that used interior fiberglass and exterior foam.

That can be partly attributed to material properties of cellulose. Dense-pack cellulose is actually less permeable to air flow than fiberglass batts. So when used as interior insulation, it reduces the amount of moisture that migrates into the stud cavity.

Cellulose also has the ability to absorb and release water vapor, allowing it to moderate moisture levels within a wall and prevent the large spikes in relative humidity that cause moisture damage.

It’s also more permeable to water vapor than EPS or XPS.  The test wall with exterior cellulose had lower humidity levels than the wall with exterior foam, because it allows faster drying to the outside.

Based on this study, dense-pack cellulose can provide a good option for exterior insulation beyond rigid foam board. In future studies we plan to look at the minimum amount of exterior cellulose needed to keep the sheathing warm and dry.

What is Timber Frame Construction

Photo Courtesy Dave Miller

Photo Courtesy Dave Miller

Timber frame homes are characterized by large structural wooden beams visible throughout the interior. Timber-frame construction techniques have been in use for hundreds of years throughout the world, initially brought to North America by European settlers.

The skilled craft of timber framing remained common practice until the early 19th century, at which point both milling and construction methods shifted to machines and mass production. Advances in technology, such as large powered circular saws, enabled mills to quickly produce large quantities of smaller dimensional lumber, which could be more easily transported. In turn, mass produced smaller framing members made it possible to erect a home with only a small team of builders using “stick frame” construction techniques that remain relatively unchanged to this day.

While timber frame construction is still in use, it has evolved from the purely practical construction technique that it once was. Originally, timber framing was primarily structural, however in today’s homes, timber frame construction is also used to showcase the aesthetics of the timber frame substructure, since it remains exposed towards the home’s interior.

Many different tree species can be used for a timber frame, including Douglas fir, Sitka spruce, Eastern white pine, red cedar, oak and Interior Alaska white spruce. The trees are handcrafted or milled into large beams.

In the United States, there are several suppliers who cut custom beams according to a computer-aided design plan sent to them by a builder.

At the building site, the beams are assembled into a structural frame that is fastened together with a combination of carefully fitted interlocking wood joints and wooden pegs and splines. In a traditional timber frame, metal connectors of any kind are seldom used. A completed frame will contain combinations of dozens of types of joinery that make it unique.

For instance, some substructures are built like wooden furniture, where the connecting beams use mortise and tenon joinery, a process through which two beams are cut so that one has a square or rectangle opening (the mortise) into which the other beam (the tenon) fits exactly.

Usually, joints of this type are held together with exposed wedges or pegs and have the additional benefit of great strength. (A similar construction technique, post-and-beam, uses metal braces and bolts to connect beams.)

After the timber frame substructure is erected, it is enclosed, often using structurally insulated panels (SIPS), to complete the home’s envelope. Most timber frames homes have open interior designs to showcase their exposed architecture. Plus, interior walls are not needed for structural purposes.

Timber frame homes come in all sizes, from small cabins to expansive homes. While timber frame construction tends to cost more than traditional stick-frame construction, the extra planning, materials, and labor results in a truly unique and durable home.

Today, timber frame construction fills both a practical and artistic role in the building community by crafting a home that is both a shelter and a work of art.

What is an Arc Fault Circuit Interrupter?

An arc fault circuit interrupter, or AFCI, is designed to detect dangerous electrical arcs and disconnect power to the circuit before a fire starts.  They contain current and temperature sensors as well as a microprocessor that can distinguish arc faults caused by unintentional electrical hazards.

An arc fault is the unintentional flow of electricity between two separate wires.  This electrical discharge can create enough heat to further break down electrical insulation and start a fire, especially if nearby objects are flammable, such as a wooden floor, wall or piece of furniture.  For instance, an arcing fault might occur in a power cord that has been damaged (for example, crushed beneath a piece of furniture).  The damaged insulation could enable electricity to jump across to a neighboring wire within the cord and build up enough heat to start a fire. Arcing faults can also occur in power cords where the insulation has cracked due to age – or in electrical wires inside a wall that have been accidentally pierced by a nail.

According to the Electric Safety Foundation International, arcing faults are responsible for 30,000 home fires each year in the United States. These types of fires can be prevented by installing AFCIs. In new homes, AFCIs are now required in the living room, bedrooms and dining room.

There are three types of AFCIs.  The most common, a branch AFCI, replaces standard circuit breakers in your home’s service panel. Branch AFCIs can detect an arc-fault in the circuit from the panel to the outlet and thus will shut off electricity to that branch circuit. Outlet AFCIs provide arc-fault protection to devices plugged into that outlet.  Combination AFCIs are a more advanced technology that can detect additional kinds of faults, such as an arc within a single wire due to a loose connection.

Does your home have AFCIs?

You can check to see if your home has AFCIs by looking at the outlets and the circuit breakers.  An AFCI outlet and circuit breakers will be labeled as such and have a TEST button on them.  AFCIs are not to be confused with ground fault circuit interrupters (GFCIs), which also have a TEST button. GFCIs are another type of electrical safety device that detect current imbalances caused by a current leak, which can occur in the case of electric shock. They are required in bathrooms and kitchens and are often installed in other locations with water exposure, because moisture increases the risk of electric shock.

GFCIs protect people from electrical shock and AFCIs protect structures from fires.  If you have AFCIs installed, they can be tested by pushing the TEST button. If the circuit trips, then the AFCI is working.  To reset the AFCI, first turn the breaker to the OFF position. Then you will need to flip the breaker back to ON.  If the circuit does not trip, the AFCI should be replaced.  AFCIs can be installed by a licensed electrician and typically cost less than $50.

For more information about AFCIs and other electrical safety devices, visit the Electrical Safety Foundation International’s websitewww.esfi.org .

What are Structural Insulated Panels and considerations for Alaska

SIPsStructural Insulated Panels, or SIPs, are prefabricated building panels that combine structural elements, insulation, and sheathing in one product. SIPs can be used for the walls, roof and floor of a building in place of more traditional construction methods, such as stick-framing. A SIP typically consists of a foam insulation core with a structural sheathing panel bonded to both faces. Sheathing panels are usually made of industry standard OSB or plywood.

Building with SIPs


Constructing a home from SIPs begins at the design phase: builders must work with the SIP manufacturer since the panels are specific to the design. Once the plans are finalized, the SIPs are made and shipped to the job site. The panels are labeled so builders know exactly where each panel goes in the building.

As they are erected, the panels must be joined together according to manufacturer specifications. For instance, many panels are joined with splines that are secured with screws. When the structural connections between panels are being made, workers must take care to seal the joint between the panels to ensure it remains airtight. Air sealing the panel joints can be accomplished using sealing agents such as caulk, adhesive, mastic, spray foam or tape. A tight seal is also necessary in order to prevent moisture from entering the panel, which can lead to structural deterioration of the panel components over time. Some building inspectors may require a 6mil polyethylene sheeting vapor retarder be installed on the interior side (warm side) of the SIPs once the panel construction is completed.

SIPs2

Electrical outlets and wiring are usually installed into recesses and holes pre-cut into the panels, both on the interior and the exterior as needed. Any special considerations for running electrical systems or other mechanical penetrations through the SIPs should be addressed with the manufacturer during the design phase.

Benefits and Concerns

There are several potential benefits to building with SIPs. For one, the absence of an air permeable wall cavity prevents convective heat losses from occurring within the panels. Large panels will have fewer framing members than a stick-framed wall, which reduces heat losses due to thermal bridging. With a trained crew, SIP buildings can be erected quickly, a big advantage in climates with short building seasons. Properly constructed, a SIP panel home can realize a high level of air tightness and energy efficiency.

On the other hand, builders must take extra care to ensure proper assembly and sealing to prevent any problems due to moisture infiltration and air leakage. Builders also do not have much flexibility in on-site design changes, since panels come pre-cut. An experienced builder who can work through a home design with the manufacturer and who doesn’t cut corners with sealing panel joints is a necessity.

SIPs can be either cost-effective or cost-prohibitive depending on the situation. The design services and shipping costs may drive the price of SIPs above that of conventional framing materials. However, this can pay off in reduced labor costs if a trained crew erects a building quickly, or if several buildings of the same design are being erected.

Egress and Home Safety

MINOLTA DIGITAL CAMERAEgress is a means of emergency escape. Not surprisingly, all houses need egress for events such as a fire, and emergency egress is required by the International Residential Code for residential buildings. The IRC requires a form of egress in basements and rooms where people sleep. Each bedroom must have its own emergency exit.

While egress could be a door opening to the outside, it is most commonly a window, and the IRC specifies minimum requirements for egress windows. For one, an egress window needs to open to a public street, alley, yard or court. Also, the window must meet minimum size requirements so people can exit. The minimum size is 5.7 square feet, unless the windowsill is on the floor, in which case the minimum is 5 square feet. The window must be at least 2 feet tall and 20 inches wide. Meeting the minimum height and width requirements doesn’t guarantee meeting the minimum area, so the window will have to be larger in at least one of those dimensions.

Finally, the window cannot be more than 44 inches from the floor, and people must be able to open the window without any special tools or knowledge. Window coverings, such as a screen or bars, are OK, but people need to be able to remove them without any special force, tools or knowledge.

Basements are often located below grade, or below the typical ground level. Since egress windows in basements wouldn’t do much good opening to soil, a window well is required outside the window. The window well should be large enough for the window to open fully, and also should contain a ladder if the well is more than 44 inches deep. Of course, the IRC specifies well and ladder dimensions if this situation applies to your home.

Does your house have emergency egress? Some older homes built before the IRC requirements do not. A means of egress is sometimes overlooked during remodels — for example, converting a space to a bedroom that was not initially planned for that use. If you have a room that does not meet the minimum egress requirements, there are many reasons to correct the problem, the most important being providing a way to exit a house safely in an emergency.

Adding egress windows in required rooms will allow your house to pass inspection should you decide to sell it and will add value to the home as well. Sometimes, adding or replacing windows can become a major project, and it must be done correctly to avoid air leakage and drainage problems later. If you need to install egress windows, find a contractor familiar with the building code and who will take the time to properly install energy efficient windows that meet the requirements.

Valuing energy efficiency in the housing market

REMOTE_pat
The Alaska Housing Finance Corporation recently released a tool that could boost the appraised value of energy efficient homes.

The AK Appraisal Tool, developed by AHFC, the Cold Climate Housing Research Center and Alaska Craftsman Home Program, allows appraisers to add value to a home that performs better than comparable homes. The tool could promote energy efficient housing through making efficient homes more affordable and increasing their resale value.

Appraisers typically look at factors like square footage, number of bedrooms and aesthetic features like granite counter tops. If a house was super-insulated or used alternative energy sources, there was no accepted way to factor that into the appraised value. This tool provides a way to value energy efficiency based on the energy bills of a house compared to other similar houses in the area.

Here’s how it works

You log onto the site  and enter basic information about a house, including the community, the energy bills and at least two of the five following pieces: street name, number of bedrooms, square feet, rating points and year built. Our 1,800-square-foot test house was located in Fairbanks and had $6,000 in annual energy costs, including heating oil and electricity. The program then searches AHFC’s database of 105,000 housing units to find all comparable homes in the same area — in this case 85 — and calculate their average utility bills — $8,150. You can enter up to 10 other comparable houses (based on other appraisals). The program crunches all this information into the “net present value,” or the energy savings of the test house versus an average house during a 5-year period — $9,058. The appraiser can add up to that amount to the value of a home (all appraisals must be reviewed and accepted by the lending institution).

The program also provides the impact to the mortgage payment. In this example, if $9,058 were added to the home’s appraised value, it would increase the monthly payment by $44 (based on a 30-year mortgage at 4.25 percent). But remember, the homeowner is saving $2,100 per year, or $180 per month, in energy compared to an average house, so the overall savings far outweighs the bump in the mortgage payment. Plus, the resale value of the energy efficient house is higher.

There are benefits to the lending institutions as well. The fact that homeowners are spending less on energy every month increases their chance of making their mortgage payments. This reduces the lender’s risk of default and foreclosure.

How will it be used?

AHFC is already training lending institutions, builders and realtors to use the tool.  Builders could also use it to show clients the potential energy savings and increased appraised value of an energy efficient house.

Thermal mass and passive solar design

In construction, thermal mass refers to heavy, dense building components with a high capacity to absorb, store and release heat, for example—logs, masonry, concrete and adobe.  These materials are used in the building envelope to provide structure, but their thermal properties mean that they can also provide other benefits. In this first article of a two-part series on thermal mass, we’ll address how thermal mass can be combined with passive solar design to reduce building heat and cooling load.  Next week we’ll examine the effect of thermal mass for more conventionally designed homes in three different locations.

Passive solar design uses a combination of building features along with the sun’s energy to provide heating in a home.  Typically, a home’s orientation combined with south-facing windows and a large thermal mass are designed to collect, store and distribute solar energy during the heating season. During the summer, features such as deciduous trees or awnings can block solar energy from entering a house and causing overheating. Many homes in Alaska use passive solar design to provide part of their heating needs during the year.

In passive solar design, there is no control system that dictates the movement of heat energy, as with a boiler or furnace.  To understand how this might work, picture a house with a concrete floor in a south-facing room on a sunny spring day in Fairbanks.  As sun’s radiation enters the room through the windows, it warms up the room and the thermal mass of the concrete floor absorbs this energy throughout the day.

ThermalMass_graphic

At night, the situation reverses.  With no incoming solar radiation, the heating system will need to work to keep the temperature of the room at the set point. However, as the room’s ambient temperature drops below the temperature of the thermal mass, the stored heat energy in the massive floor radiates back into the room, stabilizing the temperature and delaying when the heating system needs to switch on. In effect, the thermal mass acts as a heat battery, storing solar radiation until the sun disappears and then releasing it back into the room. A properly designed passive solar system can result in energy savings for a home because the thermal mass can store excess heat during the day and allow it to offset nighttime heating loads.

Although thermal mass is often in the form of a concrete floor, there are other ways to incorporate it into a home—such as a wall that receives lots of sun or a masonry bench or shelves in the sun’s path.

As the days lengthen during the spring and summer, the large south-facing windows in the above example can allow too much solar radiation to enter a room and cause it to overheat. Some people install awnings or curtains, or plant deciduous trees to shade the windows. Thermal mass also helps prevent overheating, especially in early spring before deciduous trees have leafed out.  A room that might have become uncomfortably warm during the day instead experiences less rise in temperature as the solar radiation is absorbed by the thermal mass. This energy is released later in the evening when outdoor temperatures are cooler. Overall, the thermal mass acts to smooth out temperature swings in the room, enhancing indoor comfort.